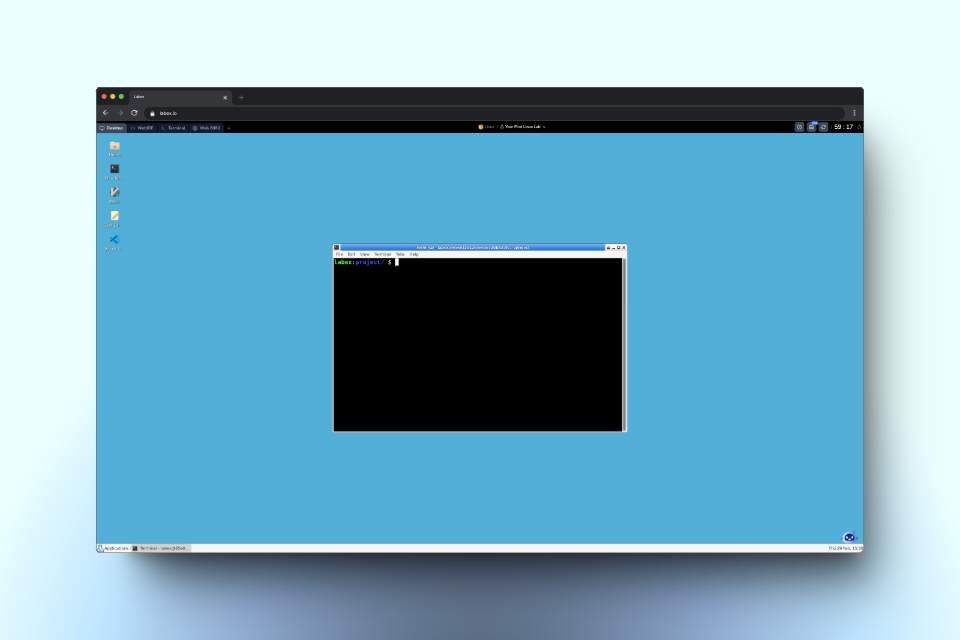
Desktop Preview
- Labs requiring a graphical interface, such as Linux GUI applications, code editors, and text editors, Python tools, and more.
- Tasks that need a web browser.
- Beginners who are not yet comfortable with command-line operations and prefer a graphical interface.
Your First Linux Lab
This is a sample Linux lab that you can complete using the Desktop Interface.
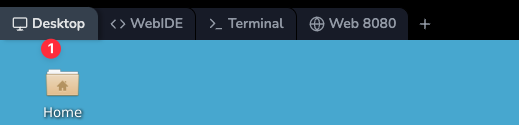
Access the Desktop
- If the instructor recommends using the desktop environment by default for the Lab, you’ll see the desktop environment when you start it.
- If you need to complete the Lab in a non-default desktop environment, you can switch to the desktop environment using the tabs at the top.
Desktop Icons
On the left side of the desktop, you’ll find several icons:- Home: Quick access to your home directory
- Xfce Terminal: A terminal emulator for command-line operations
- Gvim: A graphical version of the Vim text editor
- Text Editor: A simple text editing application
- Visual Studio Code: A popular code editor for development tasks
Using the Terminal
To access the command line interface within the Desktop environment: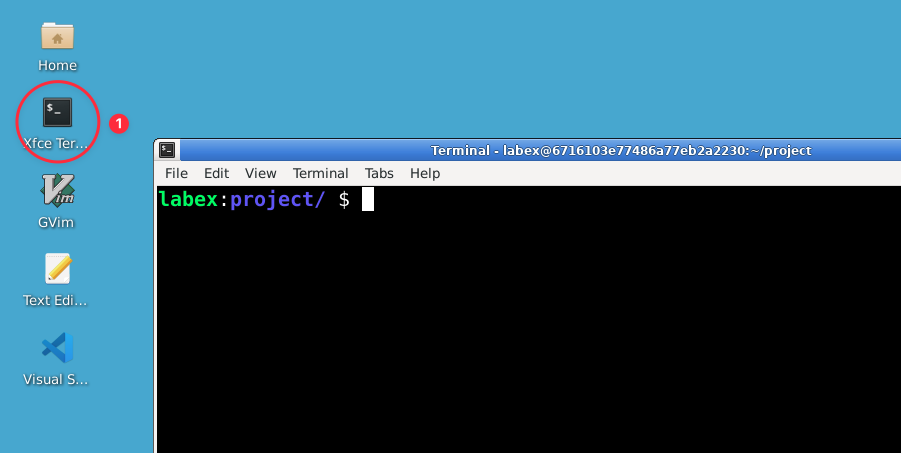
- Look for the terminal icon on the desktop
- Click to open a new terminal window
- The terminal provides a command prompt where you can enter Linux commands
- By default, the terminal uses the zsh shell
Frequently Asked Questions
How can I install applications that don't exist in the environment?
How can I install applications that don't exist in the environment?
You can use the Remember to use
apt install command to install software. The desktop environment typically uses Ubuntu 22.04, so theoretically, you can install any software compatible with Ubuntu. For example:sudo for installation commands, as they require administrative privileges.Why is the environment lagging?
Why is the environment lagging?
Environment lag can be due to several factors:
- Network latency: LabEx’s servers are located in Silicon Valley, so when accessing from other regions, there may be varying degrees of latency depending on network quality. Users from distant locations may experience higher latency compared to those closer to the server location.
- Local network: Ensure your local network bandwidth meets the minimum requirement of 10 Mbps. Poor internet connection or high latency to our servers can significantly impact performance.
- Free user allocation: Free users may be assigned to our free cluster, which can experience resource constraints during peak usage. Pro users typically have access to dedicated resources with better performance.
- Resource-intensive applications: Running applications like browsers can cause lag. Check your system’s memory and CPU usage. Heavy applications consume significant system resources and may slow down the environment.
- Switch to Terminal Tab: For bandwidth-constrained environments, consider switching to the independent Terminal Tab instead of the Desktop Interface. The terminal consumes significantly less bandwidth and provides better performance for command-line operations.
- Close unnecessary applications and browser tabs to free up resources.
- For better performance, consider upgrading to LabEx Pro for access to dedicated resources.
How can I use a browser in the environment?
How can I use a browser in the environment?
By default, most labs don’t require a browser. If you need one:
- Open a terminal and type
firefoxto launch the browser. - Note that browsers consume significant CPU resources. If the lab doesn’t explicitly require a browser, the system may automatically terminate browser-related processes.
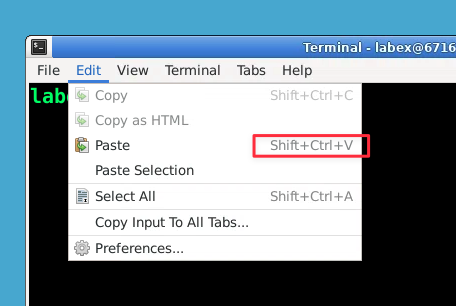
How do I copy and paste in the terminal?
How do I copy and paste in the terminal?
There are two main methods for copy and paste operations in the terminal:Method 1: Using right mouse button (Recommended)
- Select the text you want to copy in the terminal
- Right-click on the selected text to copy it
- Right-click in the terminal where you want to paste the content
- Access the View menu to see available shortcuts.
-
Default shortcuts may vary depending on your local operating system, so check the “Edit” menu for the correct shortcuts.
For example, common shortcuts include:
- Copy: Ctrl+Shift+C (Mac)
- Paste: Ctrl+Shift+V (Mac)
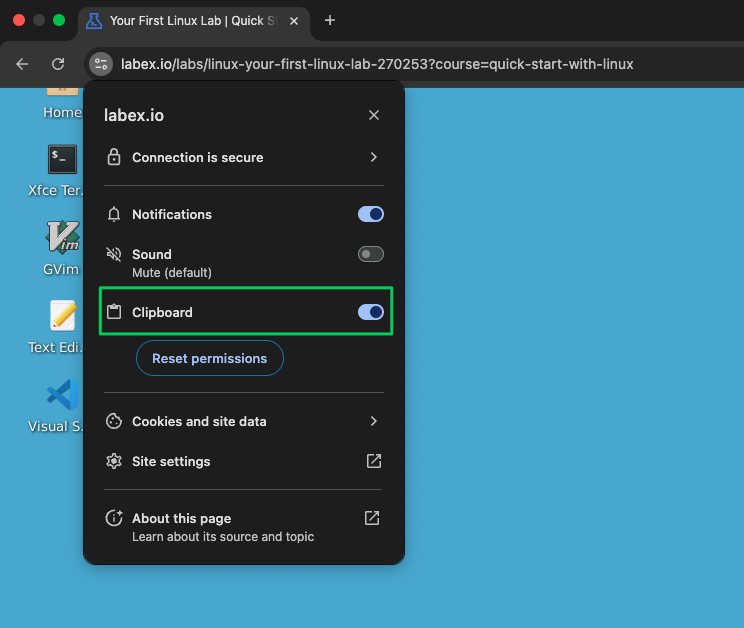
Troubleshooting copy and paste issues
Troubleshooting copy and paste issues
If you are unable to copy and paste, please check the following:
- Use Google Chrome: Ensure you are using the official version of Google Chrome.
-
Clipboard Permissions: When you first try to copy or paste, your browser will ask for permission to access the clipboard. You must click Allow. To check the current status, click the icon to the left of the website address bar to view and manage clipboard permissions.
How do I handle file uploads and downloads?
How do I handle file uploads and downloads?
The Desktop Interface does not support file uploads and downloads. If you need to upload or download files, you can switch to the WebIDE interface.Change the interface by clicking the “WebIDE” tab at the top of the page.
-
Upload Files:
- Drag and drop files into the explorer
- Use the upload/download after right-clicking in the explorer
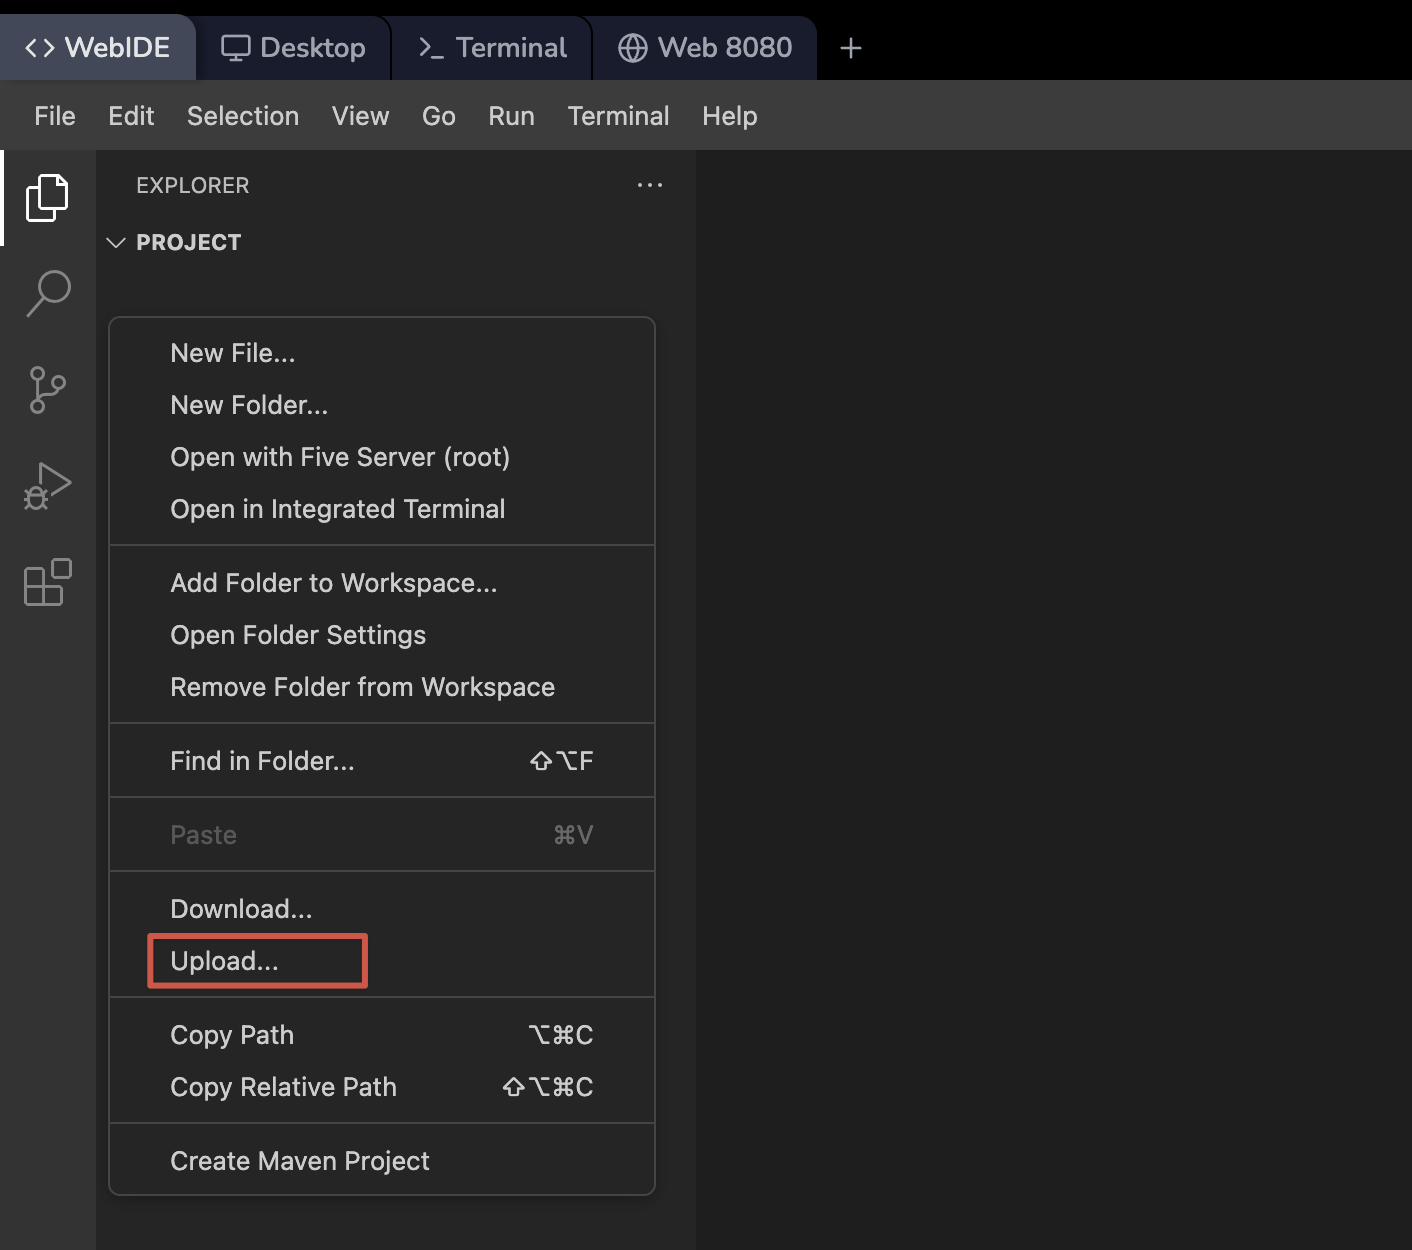
-
Download Files:
- Right-click the file in explorer
- Select “Download”
/home/labex/project directory.Remember that all files are temporary and will be lost when your session ends.Can I save my work environment?
Can I save my work environment?
Currently, LabEx VM does not provide an environment saving feature. There are several reasons for this:
- Frequent updates: Our labs are regularly updated, which could lead to incompatibilities between saved environments and current lab content.
- Maintenance costs: Storing different versions of environments for each user would significantly increase our maintenance costs and complexity.
- Lab structure: Most of our labs consist of only 3-5 steps, making it convenient to complete them without needing to save the environment.
Why can't I input the tilde (~) character on Nordic keyboards?
Why can't I input the tilde (~) character on Nordic keyboards?
The LabEx VM Desktop interface does not support the tilde (~) character input for some Nordic non-English standard keyboards. This issue is related to upstream components and is difficult to fix.Here are some alternative solutions:
- If you are using Firefox, try switching to Chrome or a Chromium-based browser (such as Brave) first.
- Switch to the independent Terminal Tab or WebIDE Tab in the top left corner, which support
~input.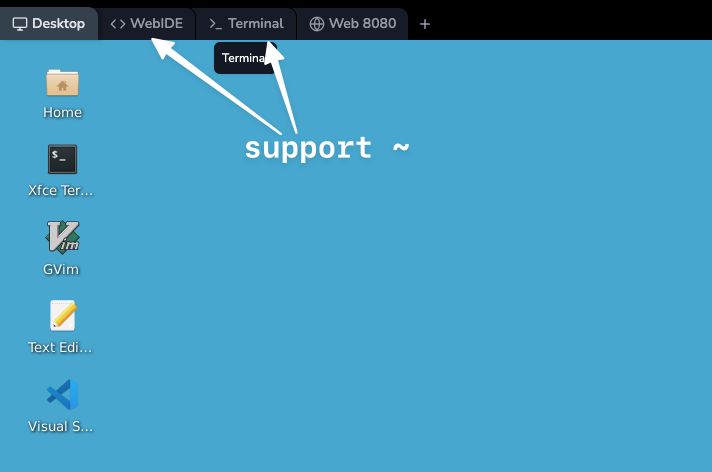
- Use absolute paths instead of
~relative paths when entering paths. - Use copy and paste to copy the
~from external sources into the Desktop Interface.