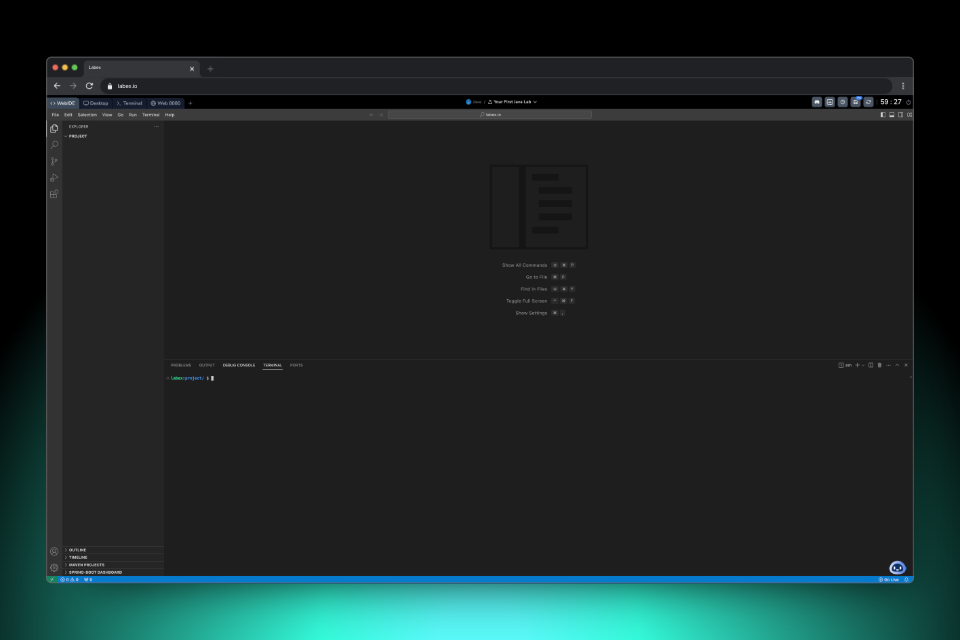
WebIDE Preview
- Writing and debugging code in various programming languages (Java, JavaScript, Python, etc.)
- Web development projects with live preview capabilities, see Create Your First HTML Page in WebIDE
- Managing project files and directories through an intuitive interface
- Integrated terminal operations for command-line tasks
Environment Layout
The WebIDE interface consists of several key components:- Left Sidebar:
- File explorer for project navigation
- Search functionality
- Source control for Git operations
- Extensions panel
- Editor Area: Main coding workspace
- Bottom Panel: Terminal, problems, and output
- Status Bar: Quick access to settings and live preview
- Top Menu Bar: File, Edit, View, and other options
Terminal Access
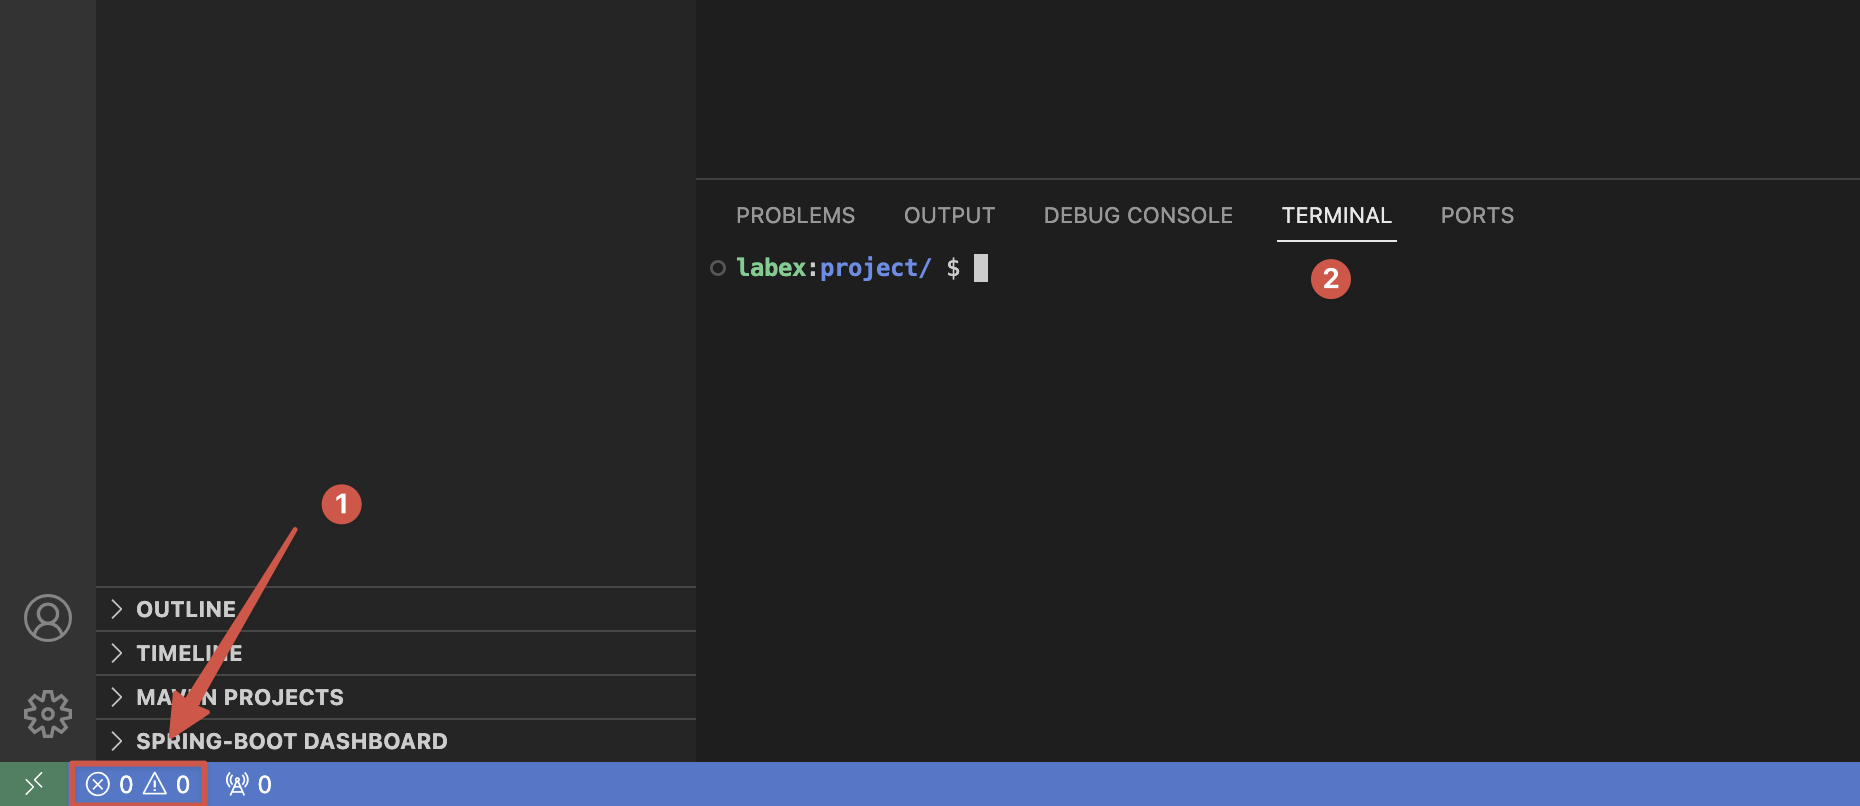
You can open the terminal in two ways:- Click the icon in the left bottom corner, and switch to the Terminal tab;
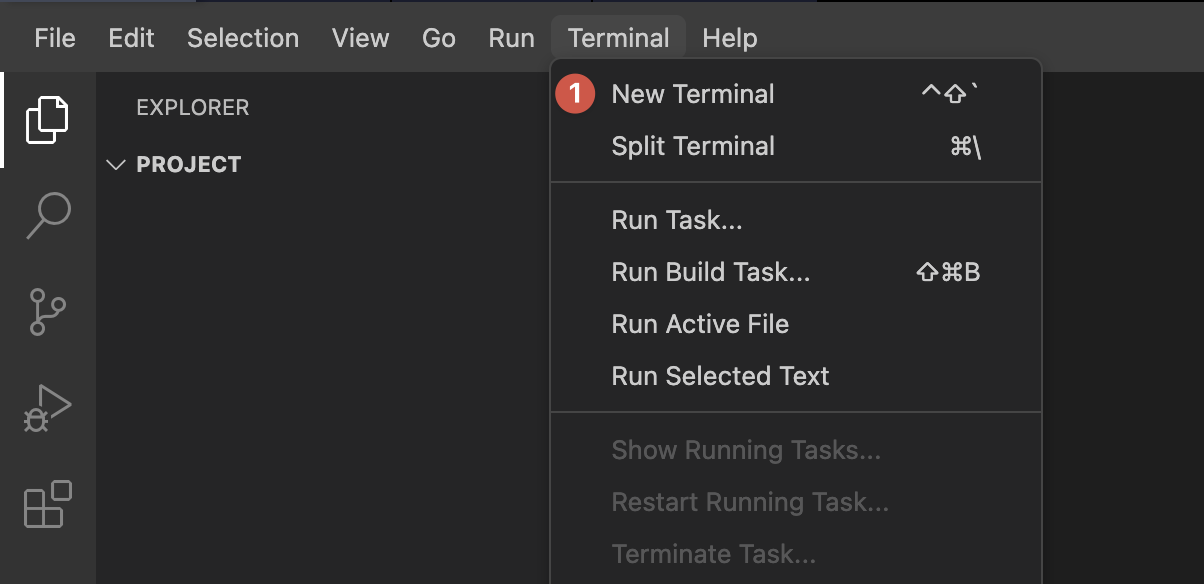
- Use the top menu: Terminal > New Terminal
Preview HTML
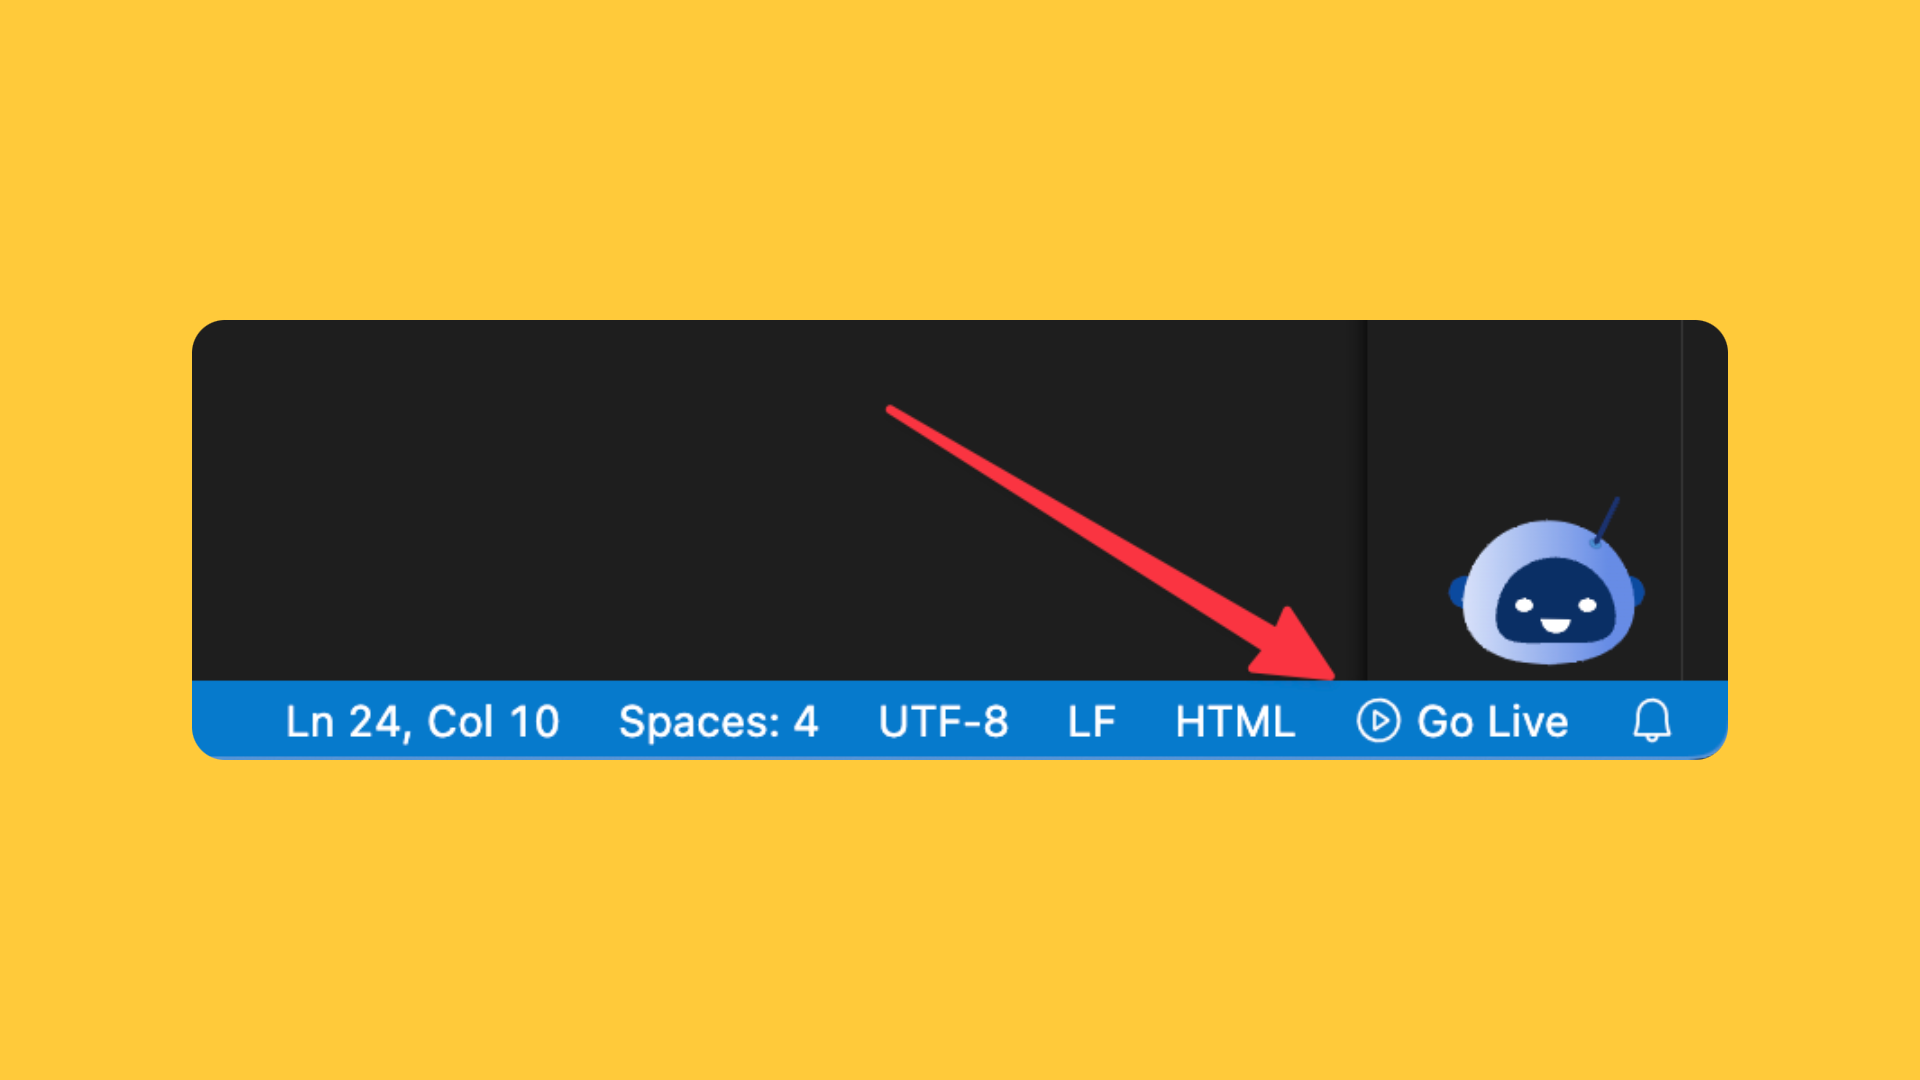
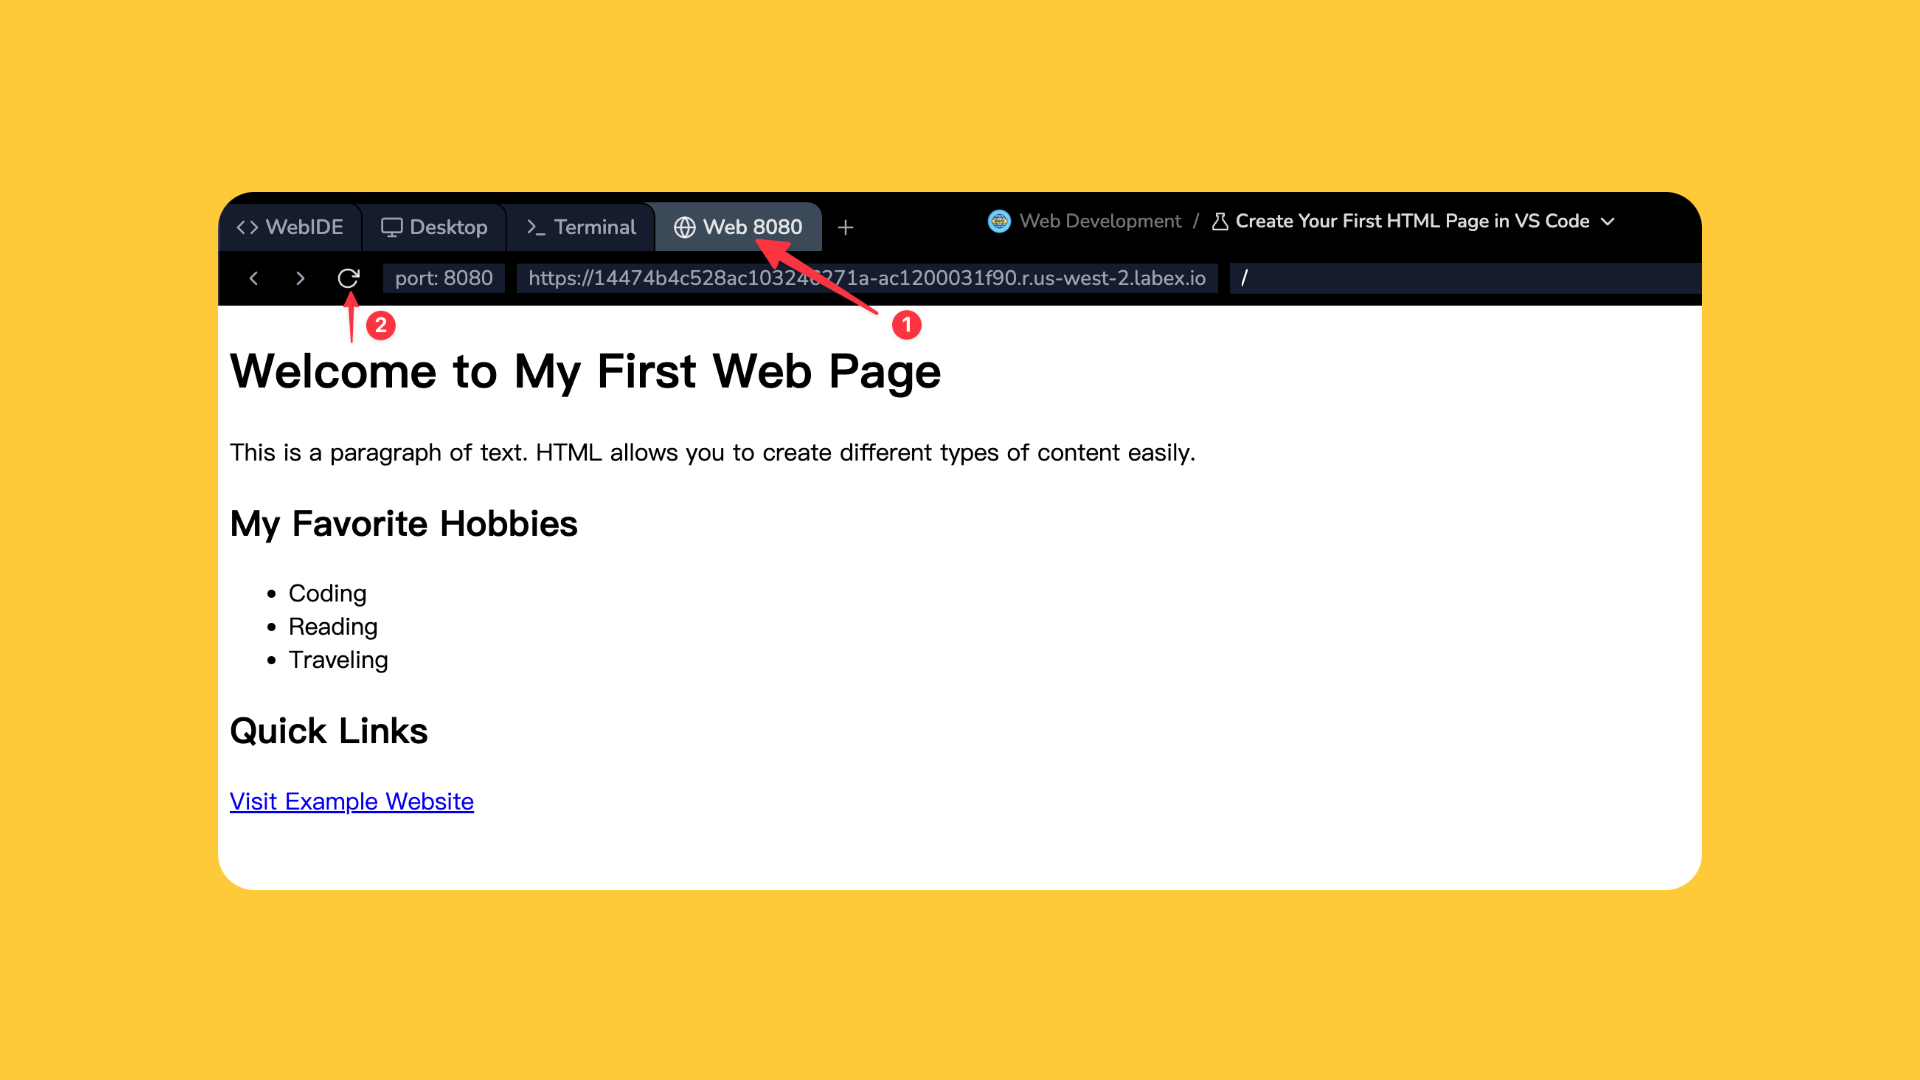
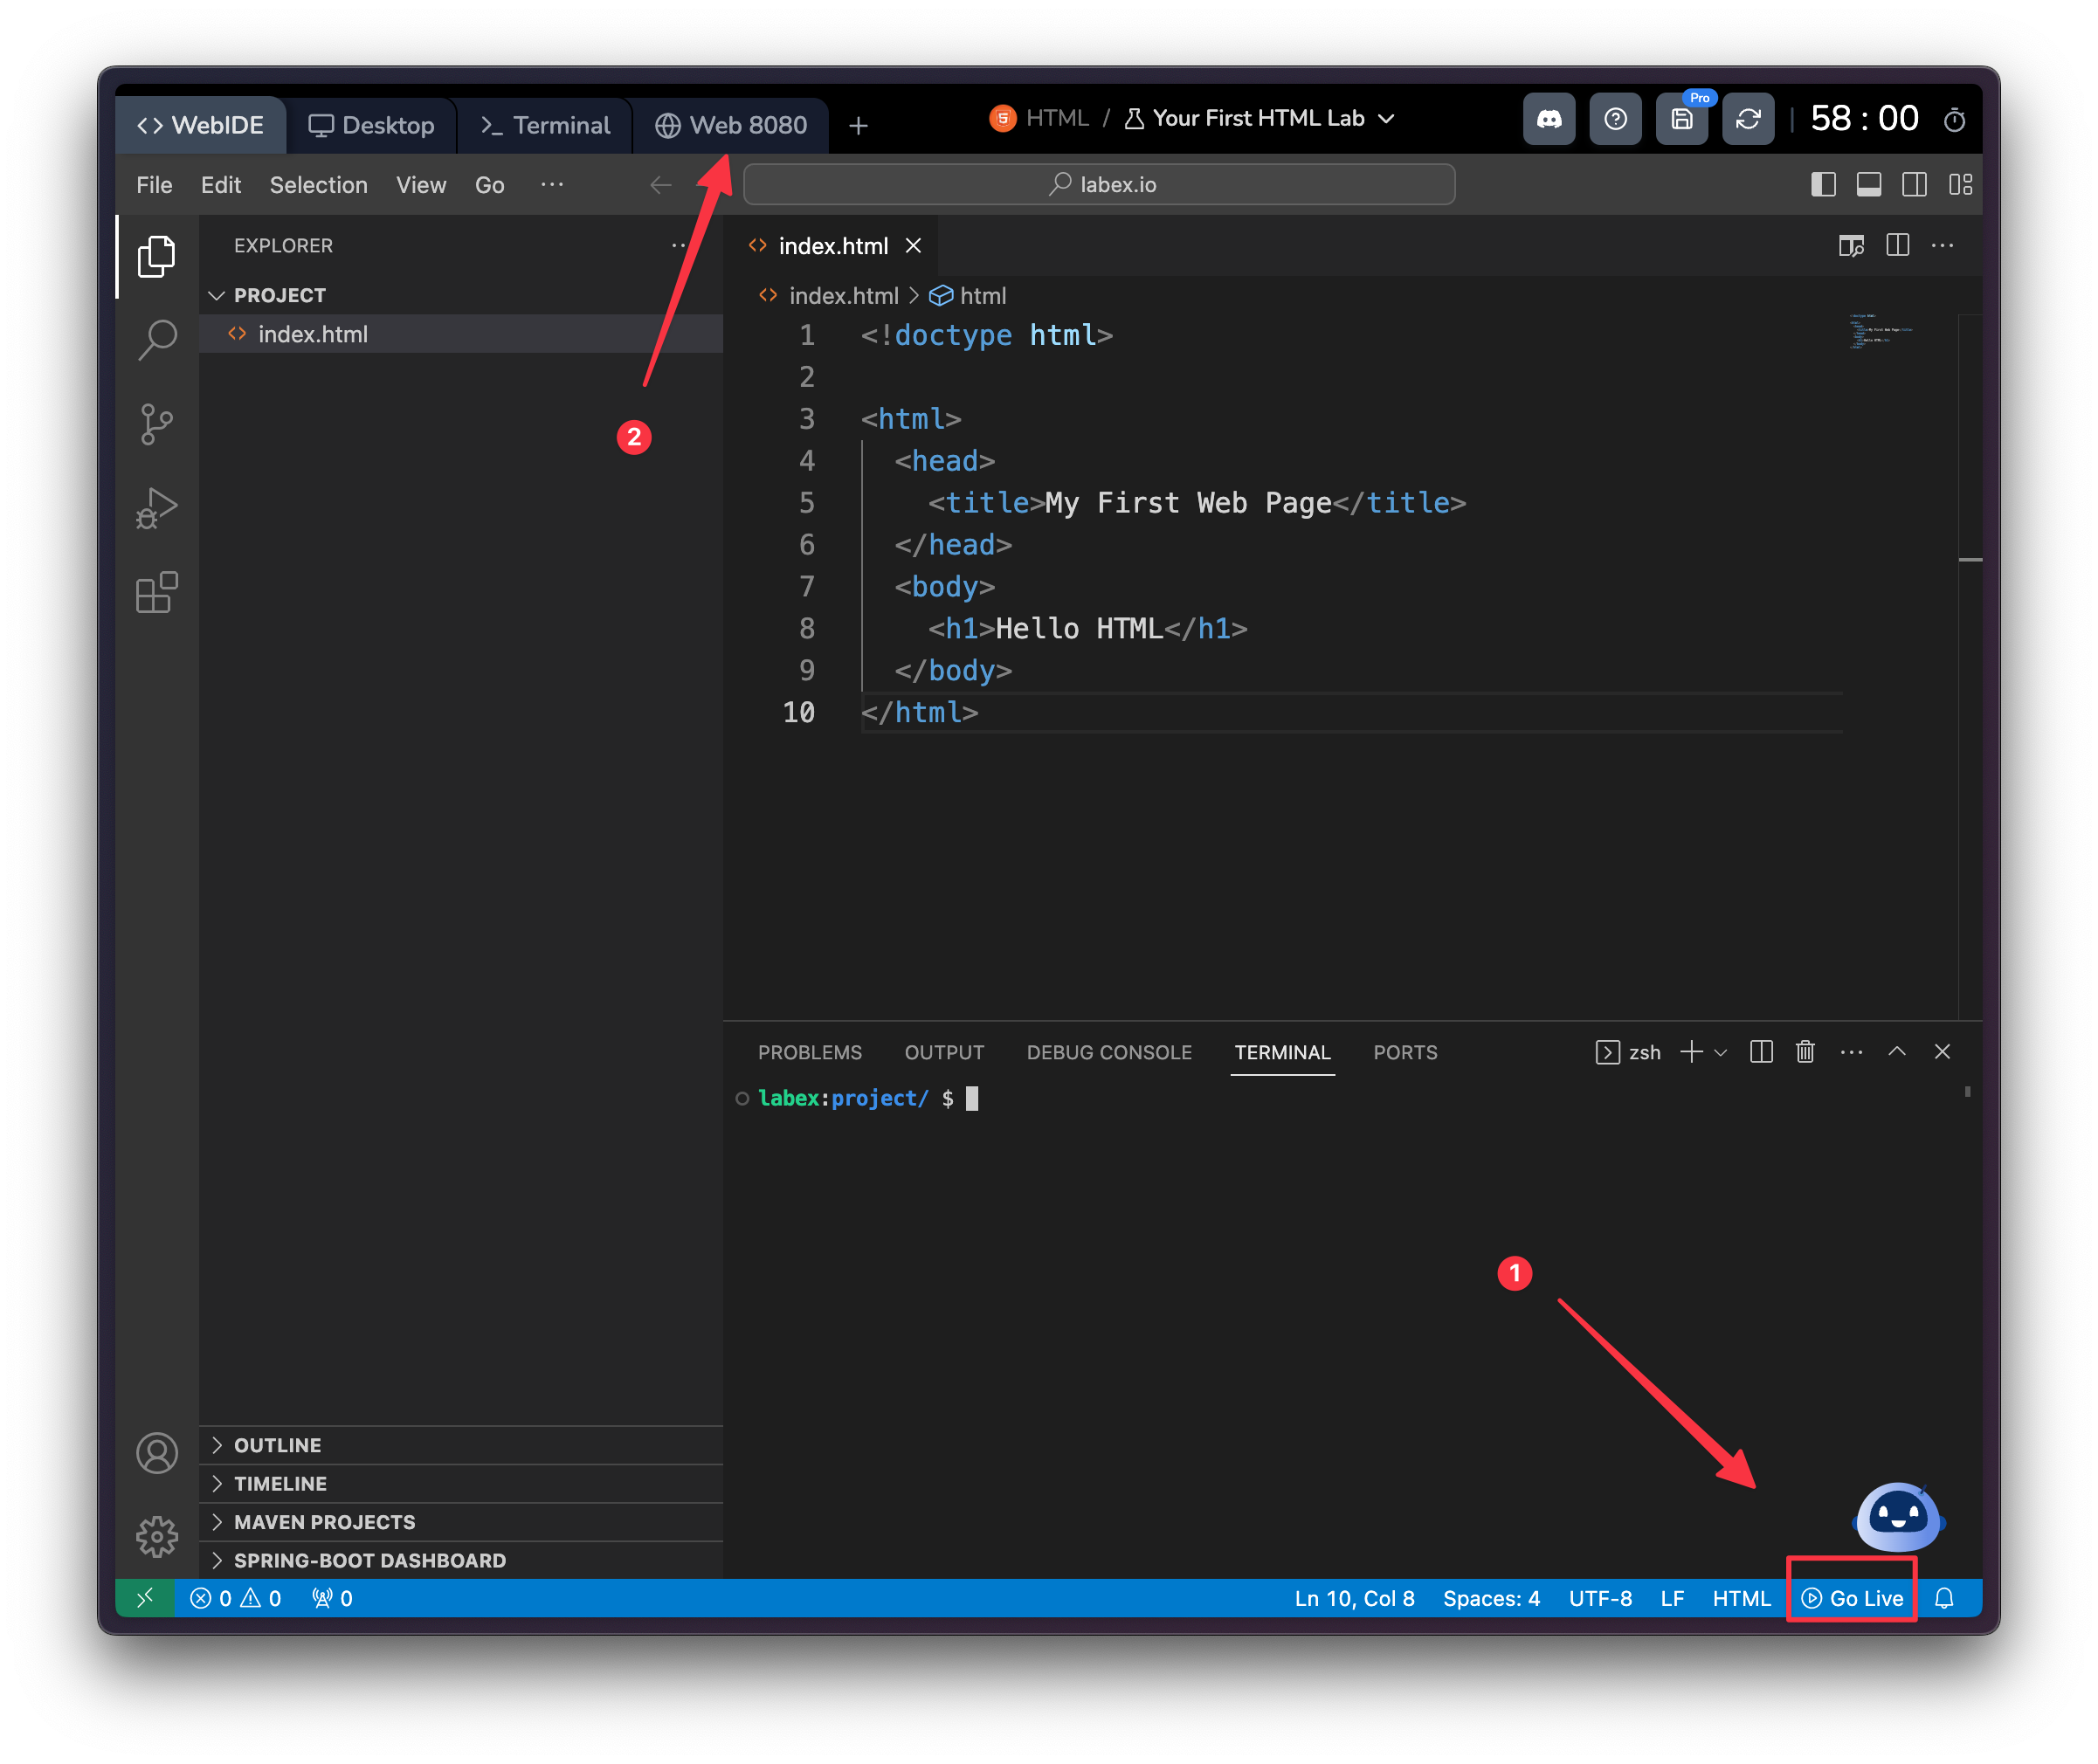
To preview your HTML file:- In the WebIDE, click on the “Go Live” button at the bottom right corner.
- A new browser tab will open with your HTML page rendered.
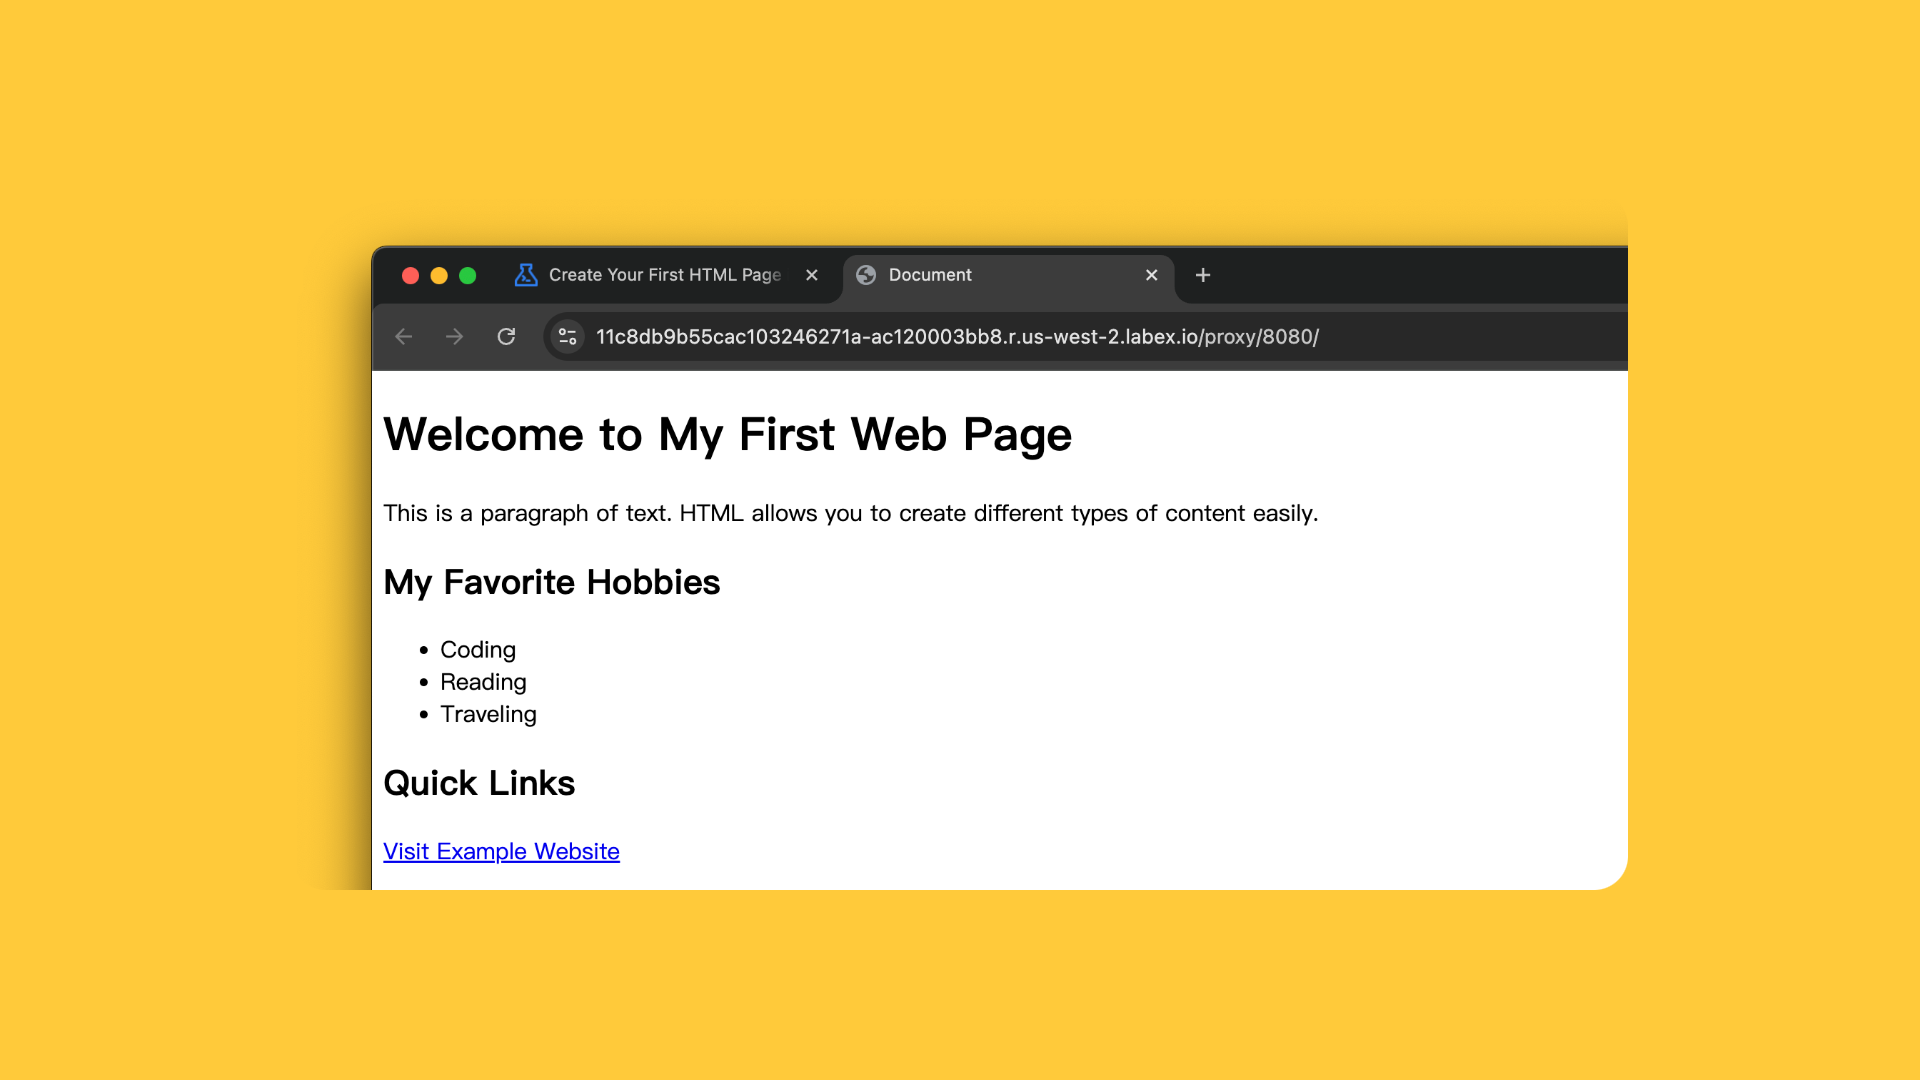
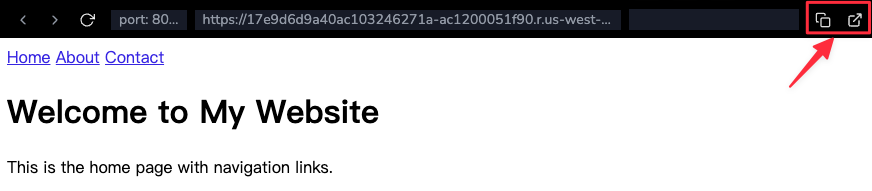
- Or, you can click on the “Web 8080” tab to open the preview.
- If your project under a subdirectory, you can access it by click the subdirectory name in the explorer, then it will automatically preview the
index.htmlfile in that directory.
- If your project has multiple HTML files, including
index.html, you can append the file name to the URL to preview it directly. For example,https://xxx.labex.io/another-file.html.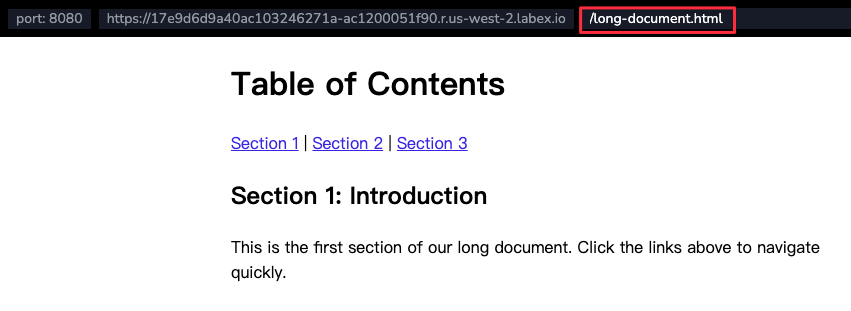
- You can open the preview in a new tab by clicking the “Open in New Tab” button. It will open the preview in a new browser tab.
- Start a web server
- Provide real-time updates as you modify your code
Tips: LabEx VM hosts the preview on port 8080. You can share the preview link with others to showcase your work. After your lab vm is stopped, the preview link will no longer work.
Usage Scenarios
Java Development Sample
Java Development Sample
Your First Java Lab
This is a sample Java lab that demonstrates how to write, compile, and run a
simple Java program using the LabEx WebIDE.
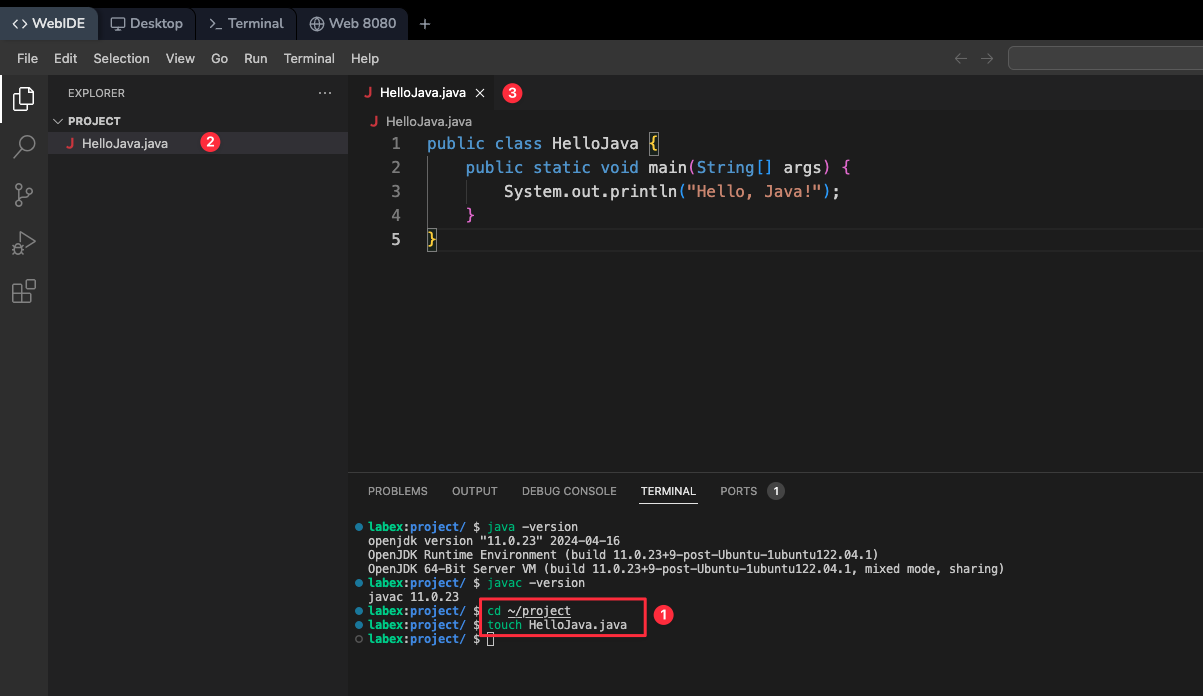
- Create a new Java file via the explorer
- Write your Java code with syntax highlighting
- Compile and run in the terminal:
- View compilation errors and warnings in real-time
Web Development Sample
Web Development Sample
Your First HTML Lab
This is a sample HTML lab that demonstrates how to create a simple web page
using the LabEx WebIDE.
- Create HTML, CSS, and JavaScript files
- Click the “Go Live” button in the bottom right corner
- Access your web page through:
- Web 8080 tab at the top of the LabEx VM
- Create new port preview tabs using the + button
Python Development Sample
Python Development Sample
Create an Astronaut Name Tag Processor
This is a sample Python challenge that demonstrates how to process astronaut
names using the LabEx WebIDE.
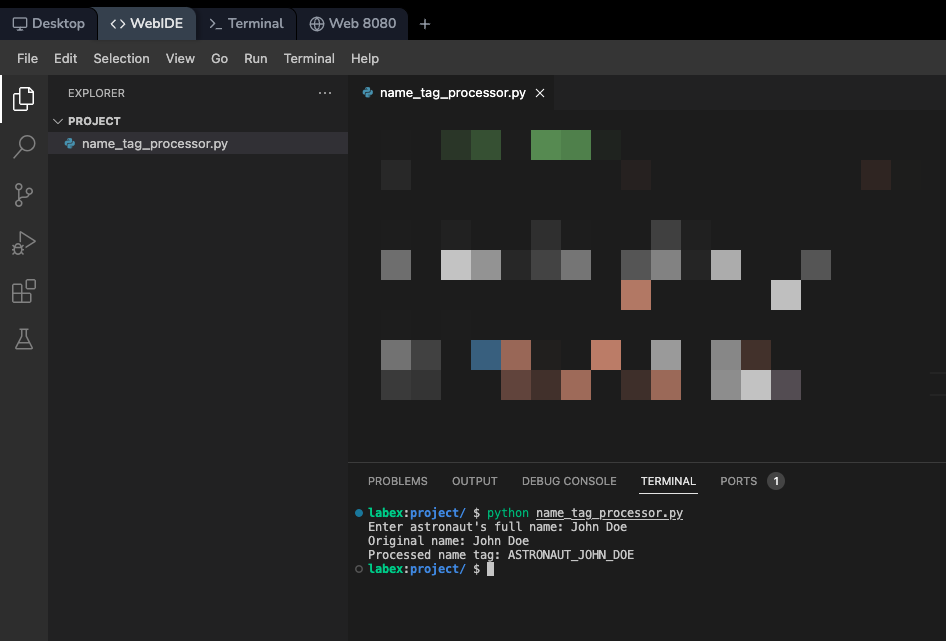
- Create a Python file in the explorer
- Write your Python code with:
- Syntax highlighting
- Code completion
- Error detection
- Run your script in the terminal:
- Use the integrated debugger for step-by-step execution
Frequently Asked Questions
How do I access my web application?
How do I access my web application?
LabEx VM automatically deploys your web projects: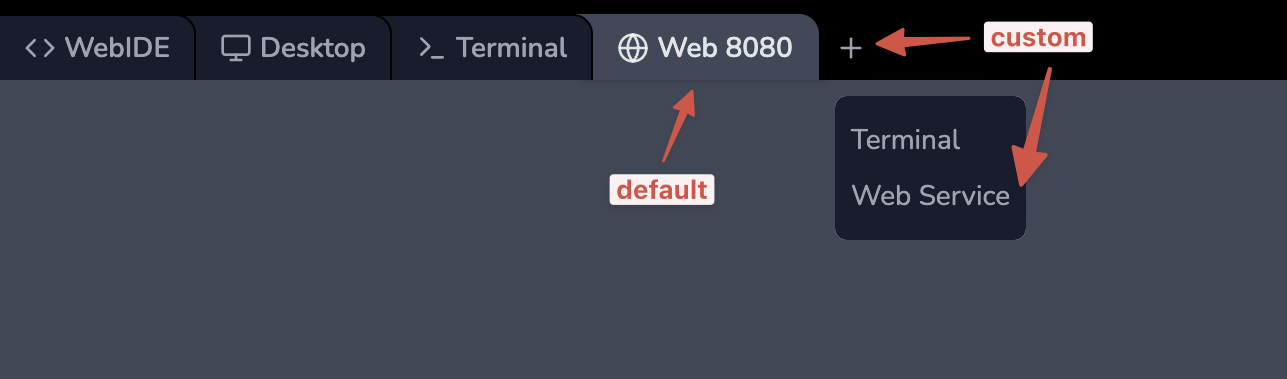
-
Default port 8080:
- Click the “Web 8080” tab at the top of the LabEx VM
- Your application will be accessible through a public URL
-
Custom ports:
- Click the + button to create new port preview tabs
- Each port gets its own public URL
- Useful for running multiple services (e.g., frontend and backend)
What are the essential keyboard shortcuts?
What are the essential keyboard shortcuts?
Common shortcuts in the WebIDE:
-
File Operations
- New File: Ctrl+N
- Save: Ctrl+S
- Find: Ctrl+F
- Replace: Ctrl+H
-
Panel Controls
- Toggle Sidebar: Ctrl+B
- Toggle Terminal: Ctrl+`
- Command Palette: Ctrl+Shift+P
-
Editor Features
- Multi-cursor: Alt+Click
- Select All Occurrences: Ctrl+Shift+L
- Format Document: Shift+Alt+F
Can I install additional tools or packages?
Can I install additional tools or packages?
Yes, you can install additional tools using the Ubuntu package manager:For language-specific package managers:Remember that installations are temporary and will be reset when your session ends.
- Node.js/npm:
- Python/pip:
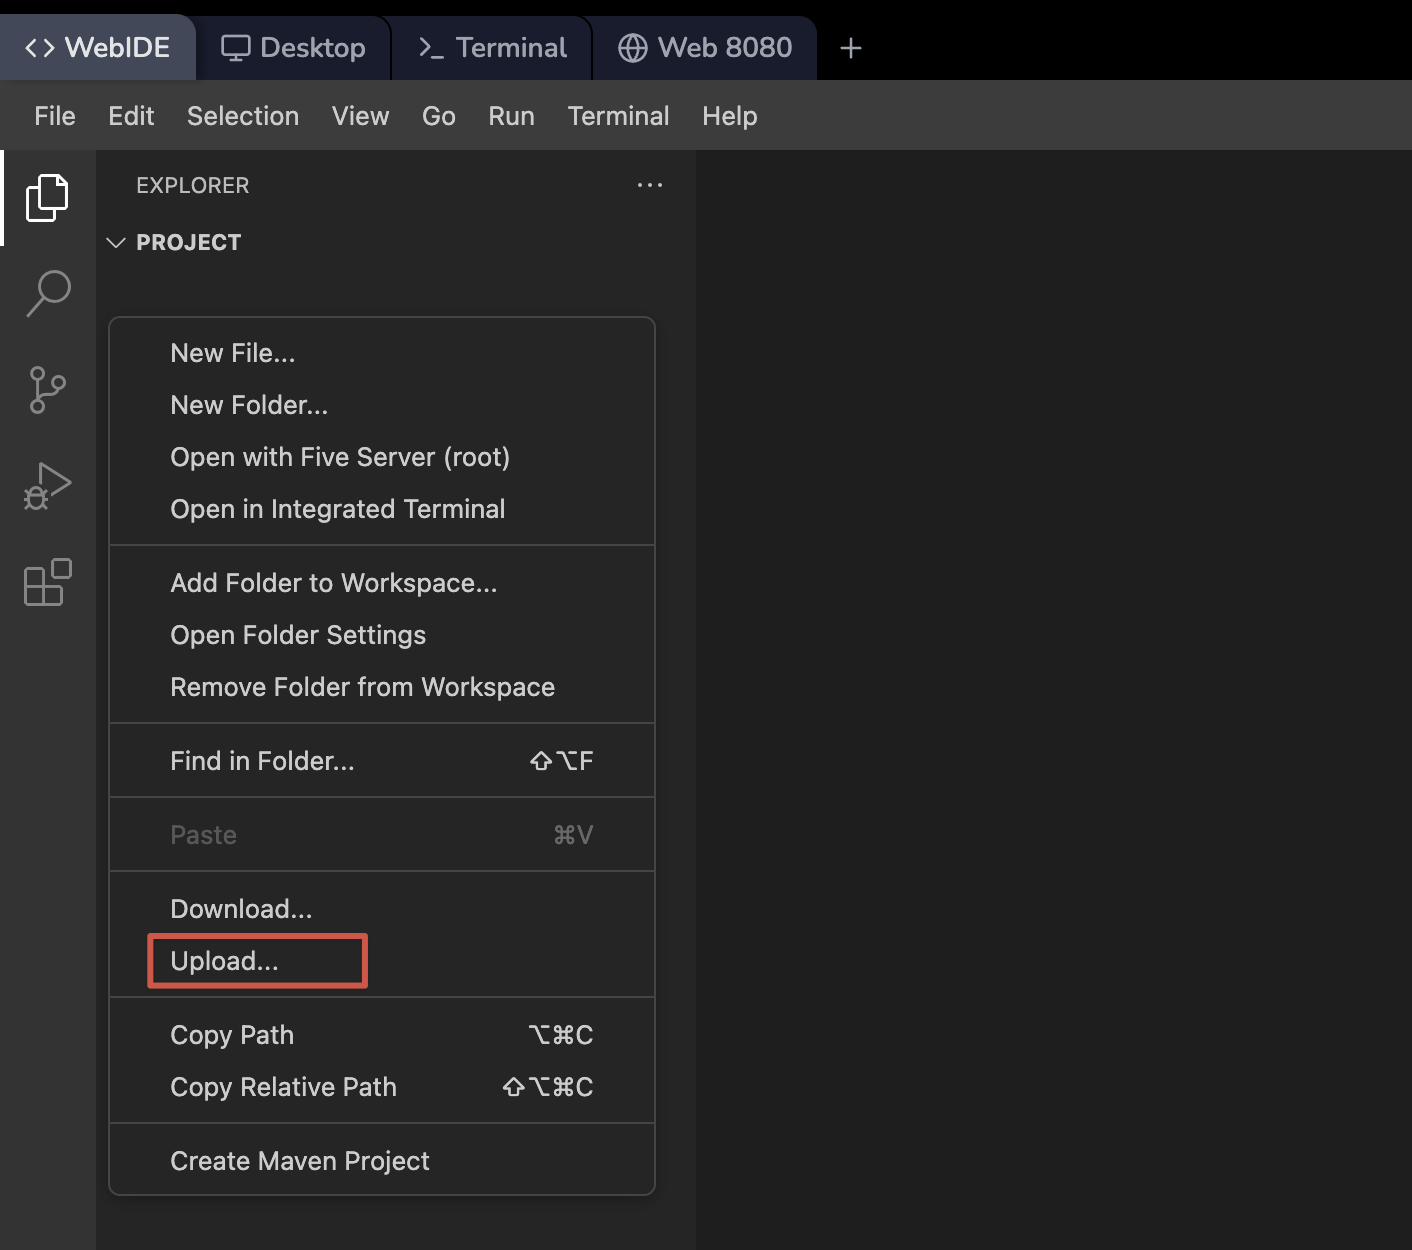
How do I handle file uploads and downloads?
How do I handle file uploads and downloads?
The WebIDE provides several ways to manage files:
-
Upload Files:
- Drag and drop files into the explorer
- Use the upload/download after right-clicking in the explorer
-
Download Files:
- Right-click the file in explorer
- Select “Download”
-
Copy/Paste:
- Text content can be copied directly between your local machine and the WebIDE
- Binary files should use the upload/download features