Introduction to LabEx Teams
Dive into LabEx Teams — our offering designed especially for businesses and educational entities. By integrating ‘Learn by Doing’ and ‘Skill Tree Based Learning’, LabEx Teams introduces tools like team management and learning progress tracking, paving the way for effective team learning. Any LabEx user can create their own Team for free and invite students and colleagues to join. Please note that the free version of LabEx Teams allows up to 100 members. To add more members or subscribe them to LabEx Pro, simply Buy LabEx Pro for Team (Minimum 5 seats required).
Key Concepts
Key Concepts
- LabEx Teams Admin & Member: The Admin oversees team learning management, while Members are learners added to the team.
- Group: A Group organizes Members into specific cohorts, such as ‘Dev Team’ or ‘Test Team’, for targeted learning and easy management.
- Lab: The fundamental learning unit, each Lab addresses particular Skills and falls under the corresponding Skill Tree. By actively engaging in Labs on the LabEx platform, learners can acquire and master these Skills.
- Skills: Specific competencies that users aim to master within a Skill Tree. By completing labs, members acquire these skills, marking their progression through the Skill Tree.
- Skill Tree: A structured learning pathway comprised of various Skills in a specific domain. By adding a Skill Tree to LabEx Teams and assigning it to a Group, you guide the learning journey of Members within that Group.
Creating a LabEx Team
To create your own LabEx Team, follow these steps:- Go to the LabEx Teams page.
- Click on the “Create Team” button.
- Enter a name and description for your team.
- Click “Create” to establish your new Team.
Payment Methods and Pricing
Payment Methods and Pricing
LabEx Teams offers flexible options to cater to different needs:Free Plan:
- Up to 100 members can use LabEx Teams for free.
- Access to basic team management and learning progress tracking features.
- To upgrade members to Pro access, you can Buy LabEx Pro for Team directly online (Minimum 5 seats required), or contact us at
info@labex.io. - Pro access includes additional features and content.
- For detailed information about Pro benefits, please refer to our pricing page.
Inviting Members
Inviting Members
Admin Side
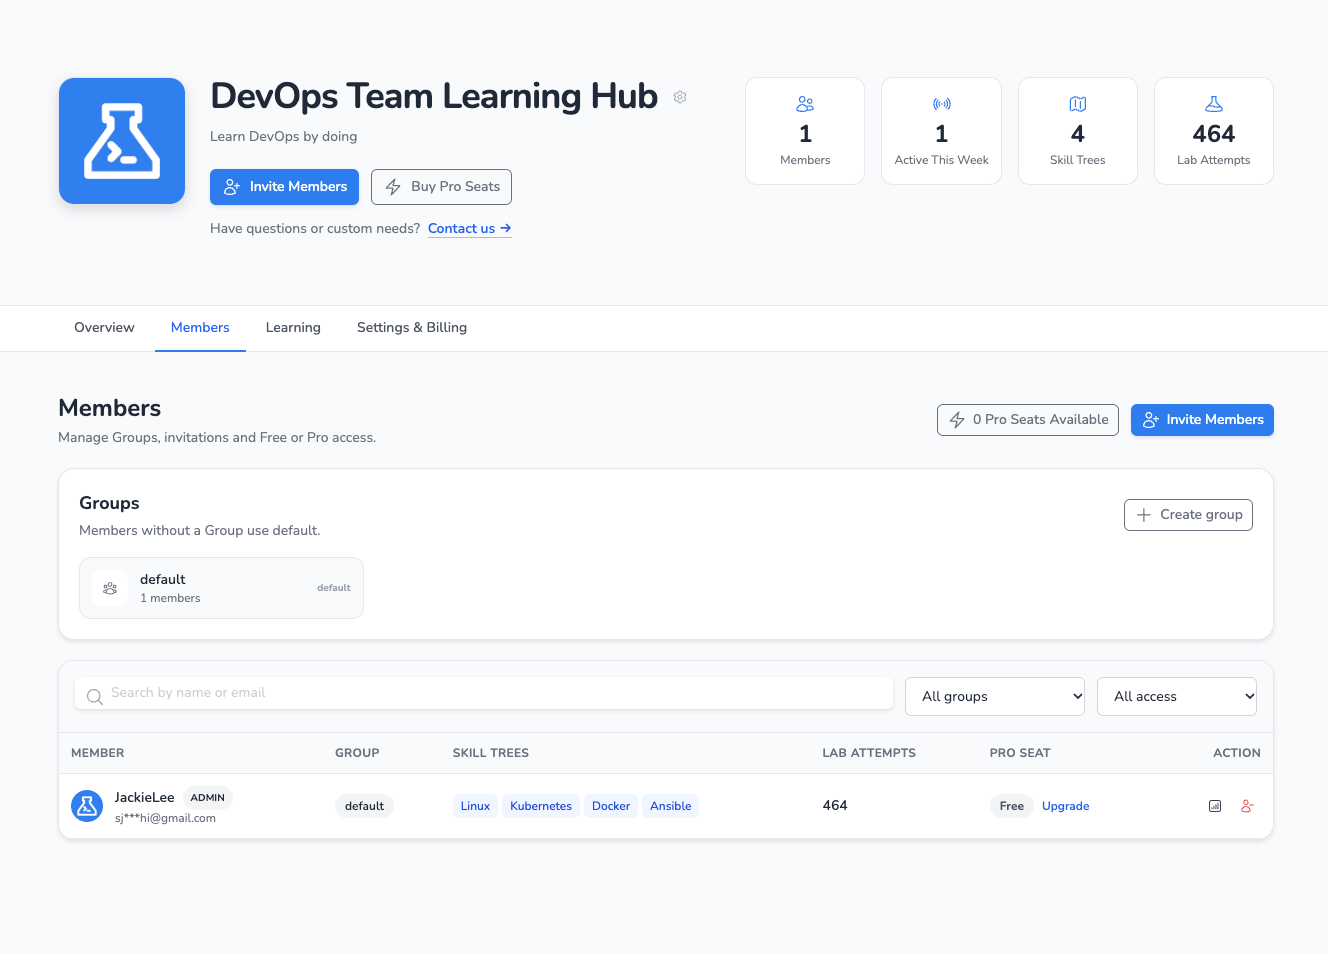
Open the “Members” tab and click “Invite Members”. There are two ways to invite members to your Team:-
Invite via Email:
- Enter the emails of the prospective members you want to invite.
- Assign them to a particular group.
- You can also resend the invitation or remove members if needed.
-
Invite via Link:
- Generate a unique invitation link for your team.
- Share this link with your team members, and they can use it to join the team.
Member Side
- Team members will receive an invitation email or notification to join the team.
- Upon registration or login to LabEx, they can view the invitation and accept it.
- After accepting, they can view the Skill Trees associated with LabEx Teams in the ‘My Learning’ page.
- Members can also go to the LabEx Teams page to see all the teams they have joined.
Configuring Skill Trees for Groups
Configuring Skill Trees for Groups
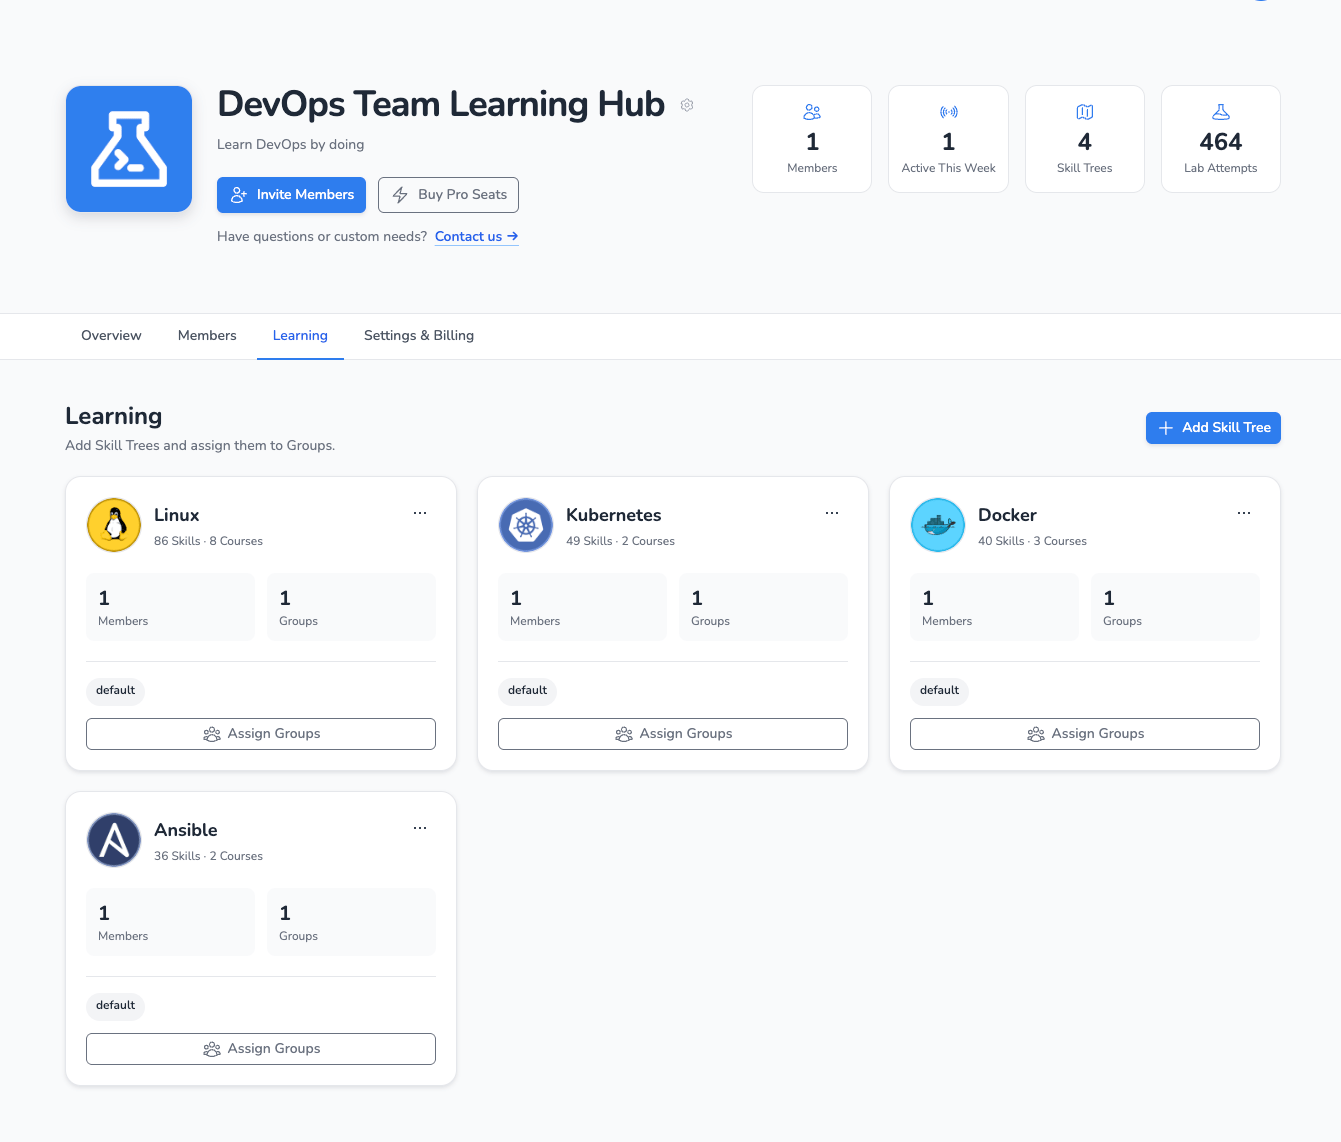
Open the “Learning” tab to configure your team’s Skill Trees:
- Click “Add Skill Tree” to add a Skill Tree from the options available on LabEx.
- Click “Assign Groups” on a Skill Tree card to assign it to the groups you want to train. Existing and future members of those groups will follow the assigned Skill Tree.
-
Each card shows the number of skills and courses, the member and group counts, and the assigned groups.
Tracking Learning Data
Tracking Learning Data
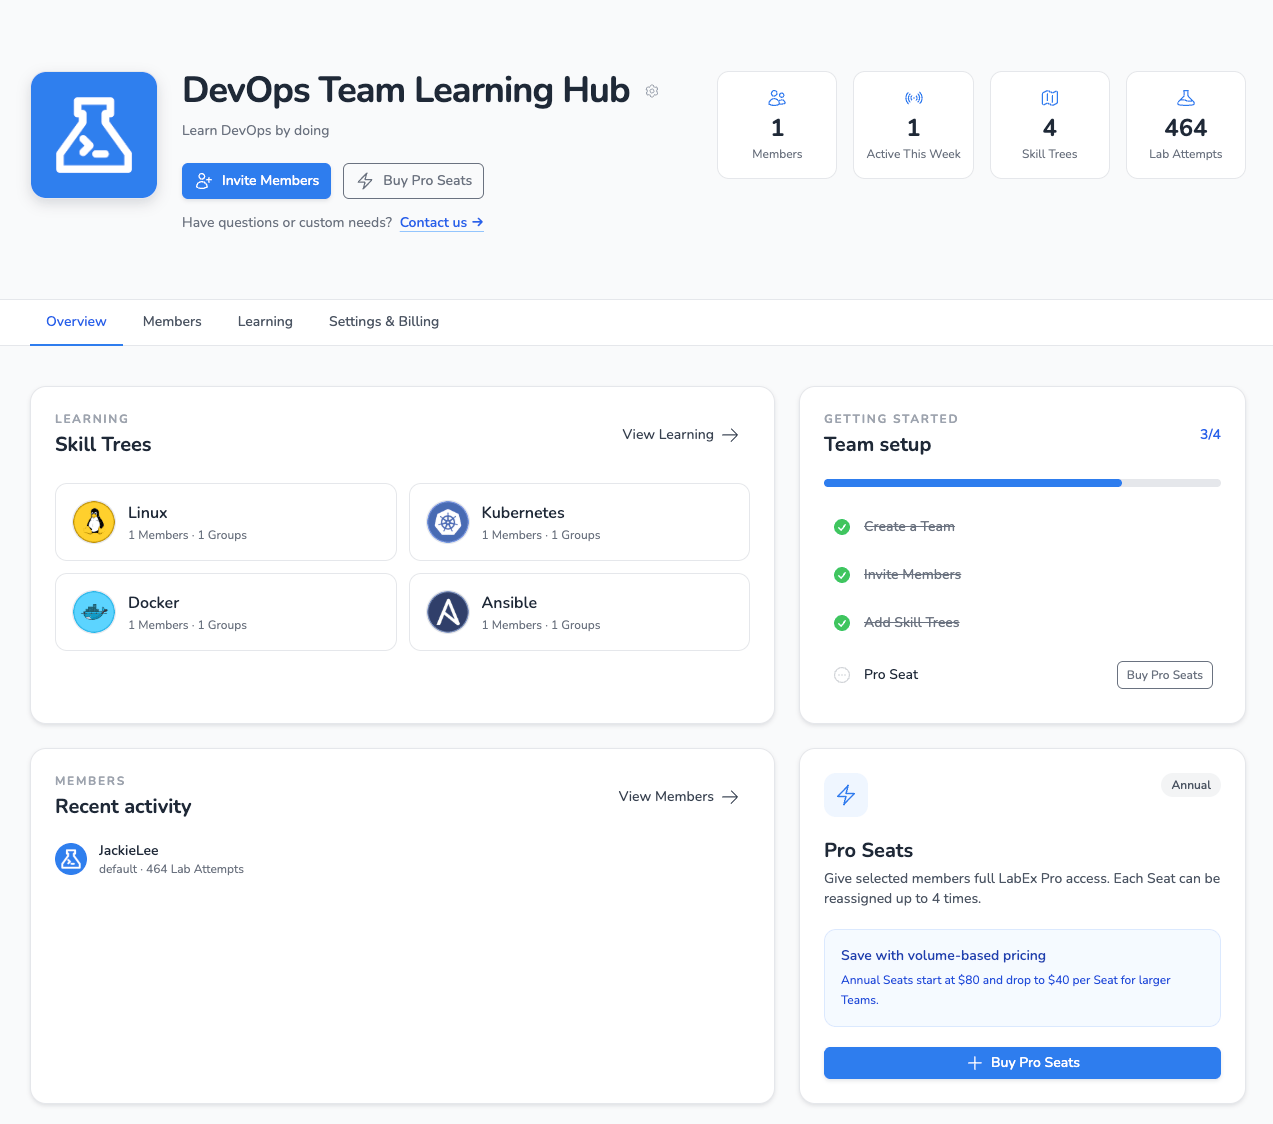
There are two main areas:Team Dashboard:Open the “Overview” tab for a summary of your team’s learning activity:
- Overview stats: Members, Active This Week, Skill Trees, and Lab Attempts.
- Skill Trees: See the Skill Trees assigned to your team and the member and group counts for each. Click “View Learning” to manage them.
- Team setup: Track setup tasks, including creating a team, inviting members, adding Skill Trees, and purchasing Pro Seats.
- Recent activity: See members’ recent activity, including their groups and lab attempt counts. Click “View Members” to explore individual learning data.
-
Pro Seats: Review Pro access information and click “Buy Pro Seats” to purchase seats for selected members.
- View individual learning data, including Total Lab Attempts and Learning Timeline.
- Graphs: Daily Engagement Trends (Last 30 Days), Progress in each Skill Tree.
- The Learning Timeline shows when the member started following a Skill Tree and when they completed each Lab.
Setting Up Team Information
Setting Up Team Information
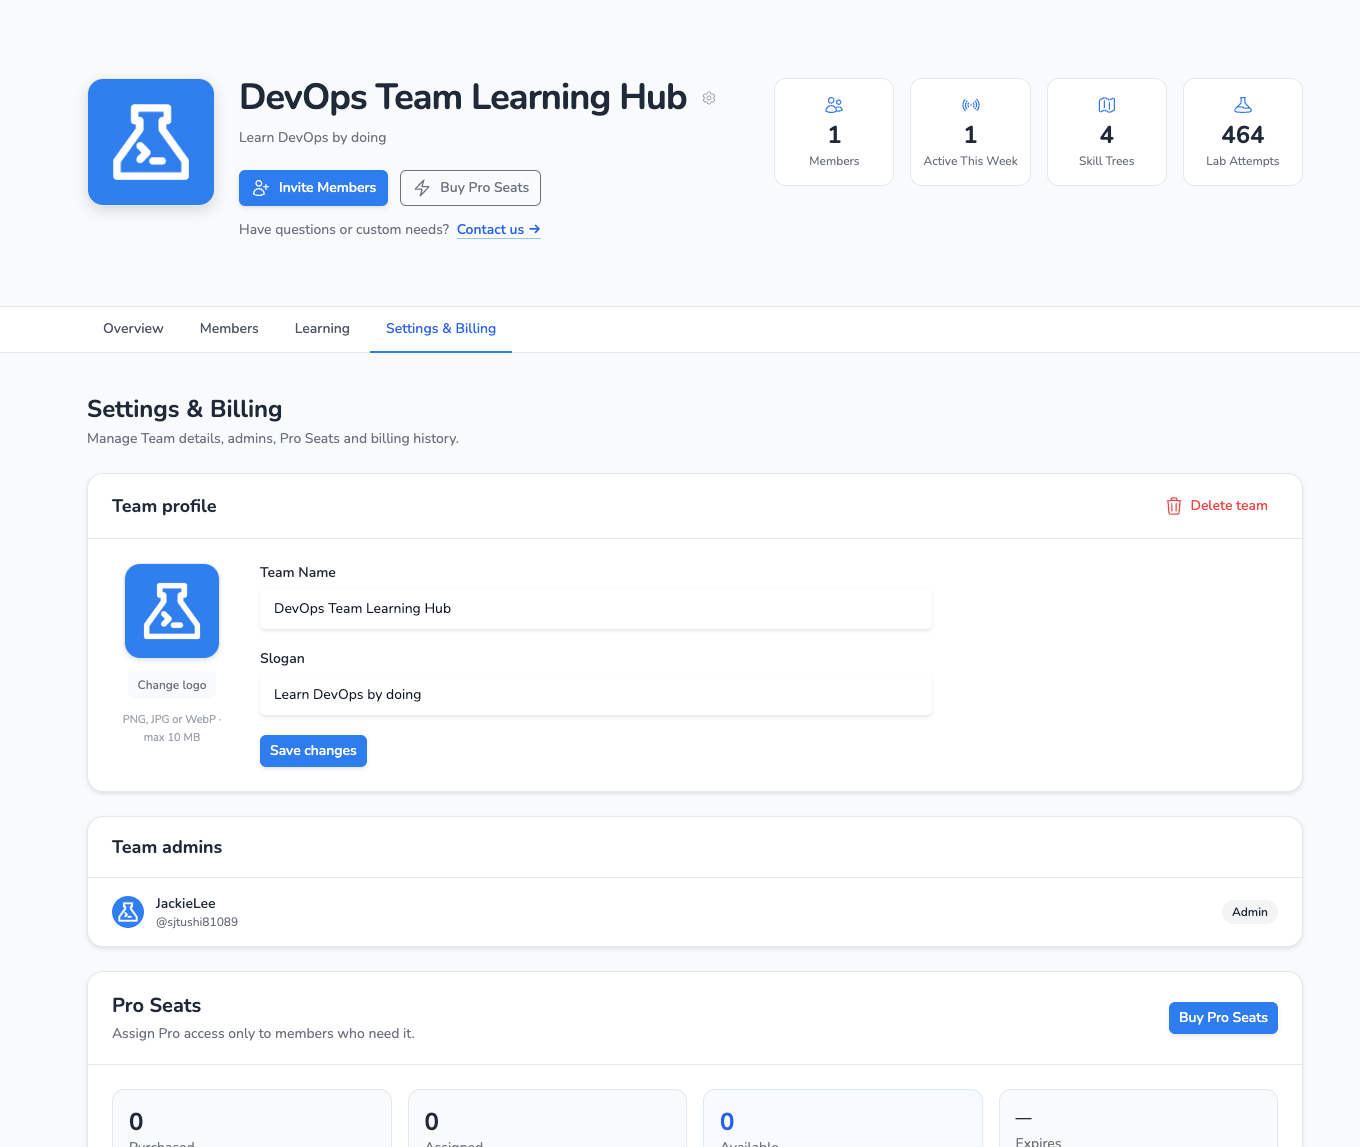
Open the “Settings & Billing” tab to manage your team:
- Team profile: Update the Team Name and Slogan, then click “Save changes”. Use “Change logo” to upload a PNG, JPG, or WebP image up to 10 MB.
- Team admins: Review the team’s administrators.
- Pro Seats: Check purchased, assigned, and available seats and their expiration date. Click “Buy Pro Seats” to purchase additional seats, and manage members’ Pro access in the “Members” tab.
-
Billing history: Review the team’s billing history.